I have been meaning to do this for a while now, a series of posts showing how I sculpt figures. this first is to show how I shape faces and I must stress this is the way I do it, it is in no way the only method, so go and experiment.
This is a series of photos taken during a session to put a face on a model. As you can see, to begin with I had a stump that would be the neck onto which I placed an appropriately sized blob of putty. In my case I tend to prefer Pro Create for most of my modelling.


This blob is basically shaped between finger and thumb to see where the nose will be.

Next I push the putty around to create a basic nose and pus in slits where the eyes will be.

The next stage involves starting to shape the nose and smooth off the face to get the right shape. All faces are not the same so just getting the basic shape will do at this stage. It is important to keep your tools wet so they don't stick to the putty. As you can see the final shape is not important at this stage, but it is the beginning of placing everything where it should be.

Next i trim off any excess around the chin and neck area, now it is starting to take some shape.

More smoothing and shaping of the features to get them looking right and approximately the right size and shape.

Next, a modelling tool is gently pushed up from the chin towards the nose to create the lower lip and then a slit is cut above this to form the mouth.

More smoothing and then taking a scalpel I cut and push to create basic eye shapes. these will be manipulated by sculpting tools to the right shape and size, smoothing everything as I go.

Now all that remains is some final smoothing and gentle shaping, pushing in the cheeks and finalising the finished shape of the face.
I don't really like the figures blown up so much in photos, the faces are only 4mm high in reality.

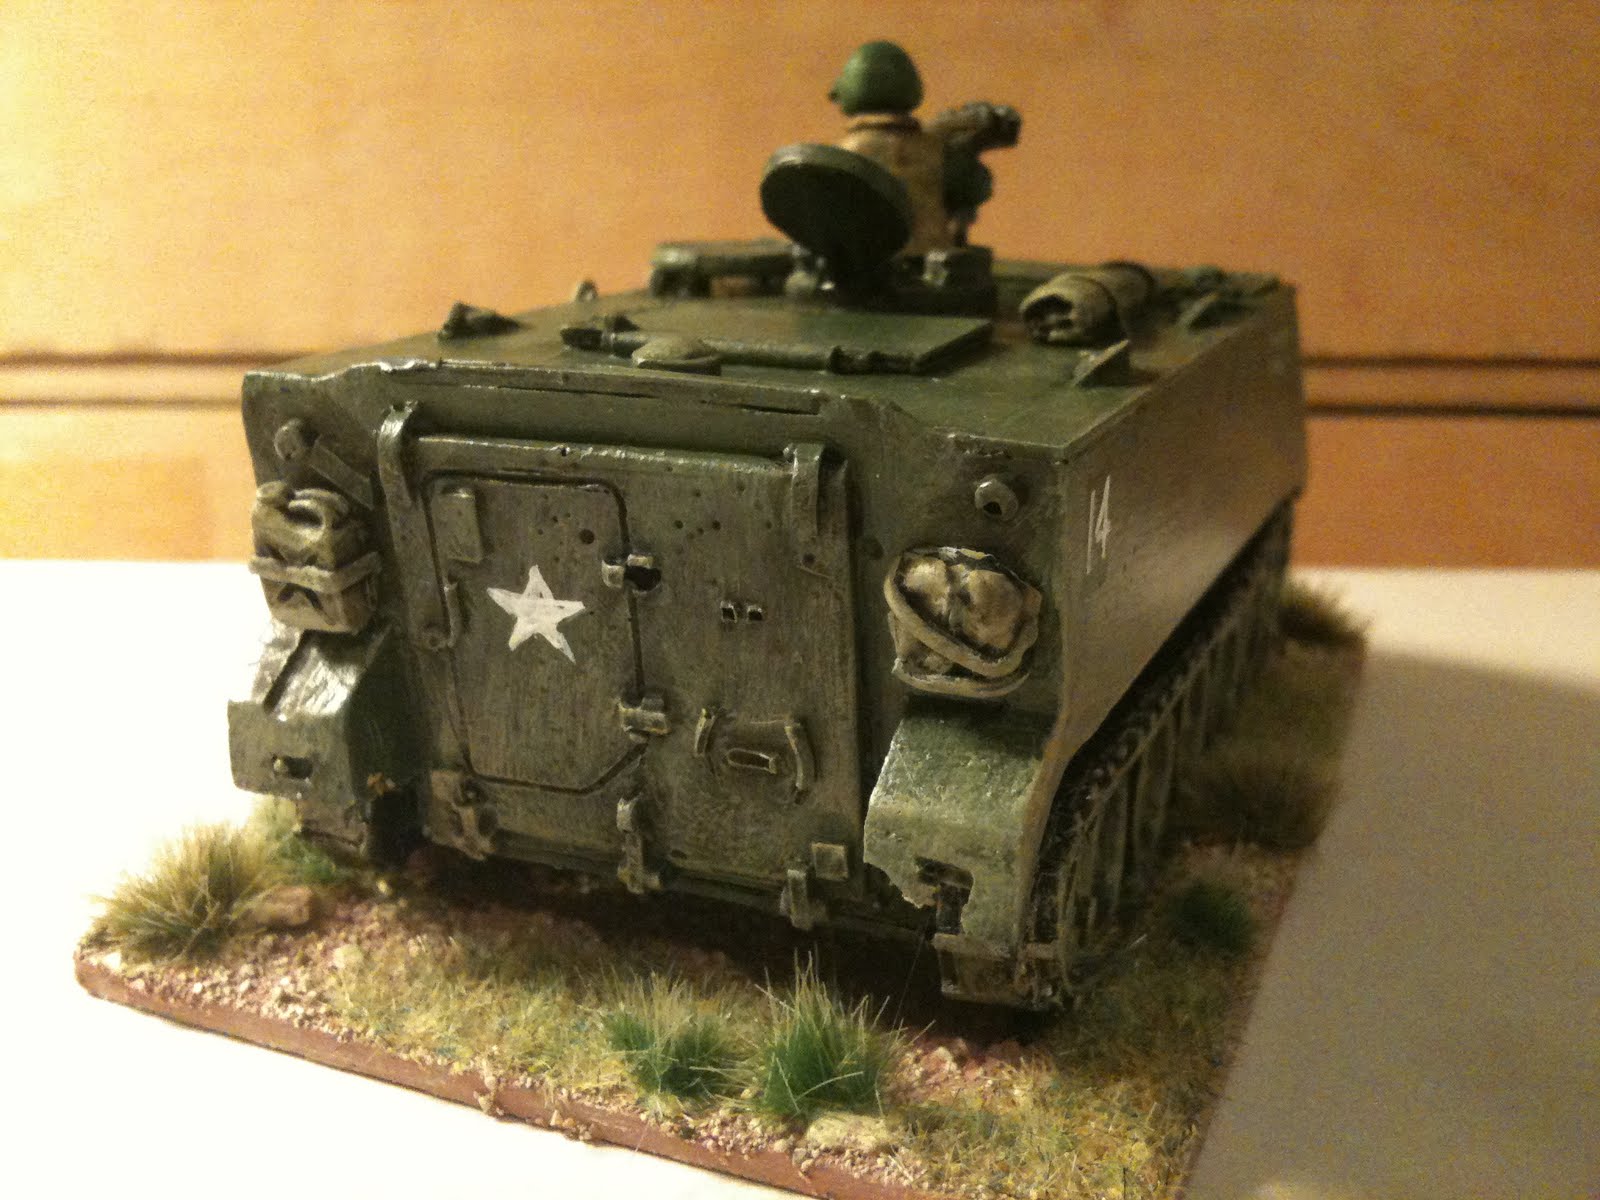


 I decided it was time to make some transport for the US in Vietnam, so the M113 project began.
 I plan to make the hull in resin with the wheel assemblies and accessories in metal. The wheels are plastic rod cut down, the next stage is to fill the hollows with magic sculpt and impress the detail using a die I have made from magic sculpt. The next stage, if it works, will show the wheel detail done.
 Kit Carson scouts in a variety of dress with a variety of weapons
 Prone US M 60 crew
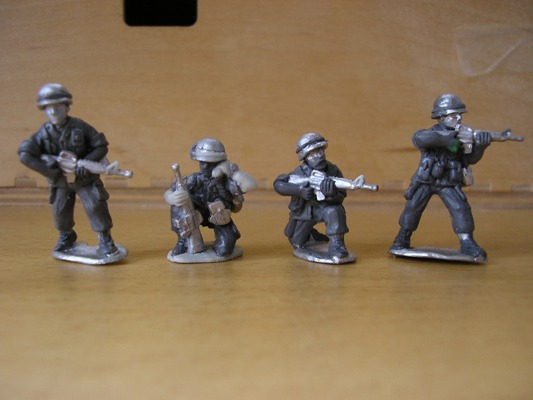
 The next batch are now underway. My intention is to produce, at least to start with, enough figures to create a squad each for the US and VC forces. I am aiming at 9 figures of each then a few variants before moving onto, maybe, ARVN and VC Main Force figures.
 Above is a VC squad leader and RPD gunner with, below, a view of the three figures I have got farthest with so far. I am working on a few more US infantry figures to include a squad leader, grunt with M-79 grenade launcher and one with M-60.
 The centre figure is from the new Parkfield Miniatures 28mm range of figures with, on the left. a FoA figure and on the right, a figure from TAG
 The first US soldier rolls off the workbench, a RTO crouching holding handset to his ear.


 This blob is basically shaped between finger and thumb to see where the nose will be.
 Next I push the putty around to create a basic nose and pus in slits where the eyes will be.
 The next stage involves starting to shape the nose and smooth off the face to get the right shape. All faces are not the same so just getting the basic shape will do at this stage. It is important to keep your tools wet so they don't stick to the putty. As you can see the final shape is not important at this stage, but it is the beginning of placing everything where it should be.
 Next i trim off any excess around the chin and neck area, now it is starting to take some shape.
 More smoothing and shaping of the features to get them looking right and approximately the right size and shape.
 Next, a modelling tool is gently pushed up from the chin towards the nose to create the lower lip and then a slit is cut above this to form the mouth.
 More smoothing and then taking a scalpel I cut and push to create basic eye shapes. these will be manipulated by sculpting tools to the right shape and size, smoothing everything as I go.


